In the blog of apparel recognition, we use digitized dense values to recognize a given picture. Now we go further to mimic true eyes that can identify not only a picture as a whole but objects within the picture.
This is relying on the type of ML algorithm called Convoluted Neural Network or Convnet.
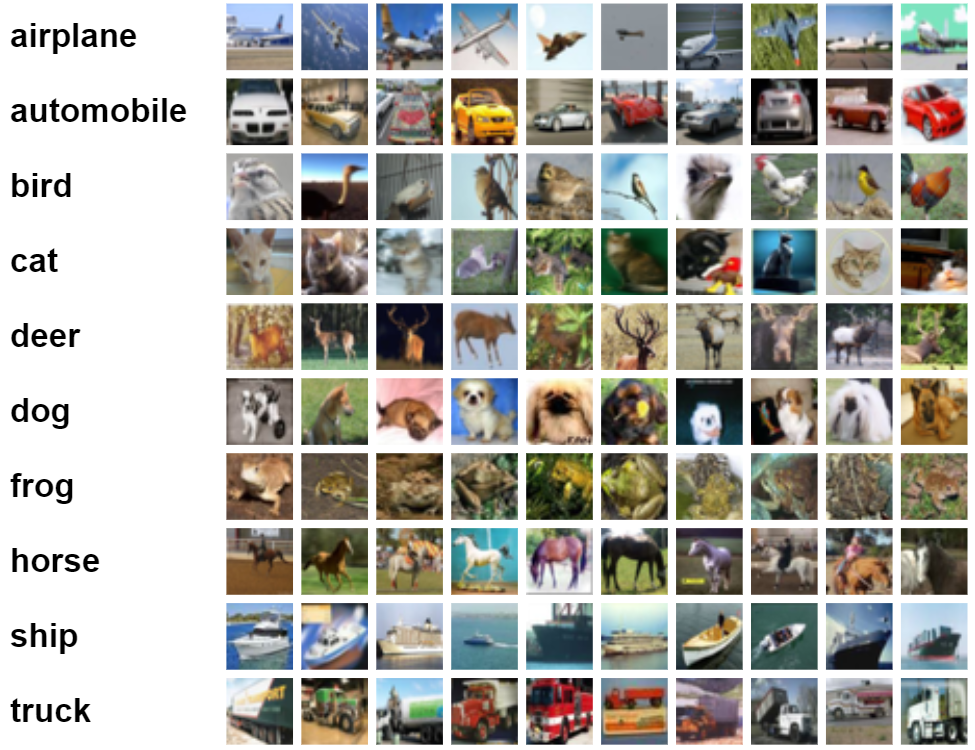
To learn how this convnet work, let’s start with a simple case, CIFAR-10 image dataset containing 60,000 32×32 color images with 6000 images of each class.
The detailed codes and short exaplanations are
#deep computer vision analysis cnn convnet
%tensorflow_version 2.x  # this line is not required unless you are in a notebook
import tensorflow as tf

from tensorflow.keras import datasets, layers, models
import matplotlib.pyplot as plt
#  LOAD AND SPLIT DATASET
(train_images, train_labels), (test_images, test_labels) = datasets.cifar10.load_data()

# Normalize pixel values to be between 0 and 1
train_images, test_images = train_images / 255.0, test_images / 255.0

class_names = ['airplane', 'automobile', 'bird', 'cat', 'deer',
               'dog', 'frog', 'horse', 'ship', 'truck']

# Let's look at a one image
IMG_INDEX = 7  # change this to look at other images

plt.imshow(train_images[IMG_INDEX] ,cmap=plt.cm.binary)
plt.xlabel(class_names[train_labels[IMG_INDEX][0]])
plt.show()

model = models.Sequential()
model.add(layers.Conv2D(32, (3, 3), activation='relu', input_shape=(32, 32, 3)))
model.add(layers.MaxPooling2D((2, 2)))
model.add(layers.Conv2D(64, (3, 3), activation='relu'))
model.add(layers.MaxPooling2D((2, 2)))
model.add(layers.Conv2D(64, (3, 3), activation='relu'))

#adding layers
model.add(layers.Flatten())
model.add(layers.Dense(64, activation='relu'))
model.add(layers.Dense(10))

#now training
model.compile(optimizer='adam',
              loss=tf.keras.losses.SparseCategoricalCrossentropy(from_logits=True),
              metrics=['accuracy'])

history = model.fit(train_images, train_labels, epochs=4,
                    validation_data=(test_images, test_labels))

test_loss, test_acc = model.evaluate(test_images,  test_labels, verbose=2)
print(test_acc)

#data augmentation to help training
from keras.preprocessing import image
from keras.preprocessing.image import ImageDataGenerator

# creates a data generator object that transforms images
datagen = ImageDataGenerator(
rotation_range=40,
width_shift_range=0.2,
height_shift_range=0.2,
shear_range=0.2,
zoom_range=0.2,
horizontal_flip=True,
fill_mode='nearest')

# pick an image to transform
test_img = train_images[20]
img = image.img_to_array(test_img)  # convert image to numpy arry
img = img.reshape((1,) + img.shape)  # reshape image

i = 0

for batch in datagen.flow(img, save_prefix='test', save_format='jpeg'):  # this loops runs forever until we break, saving images to current directory with specified prefix
    plt.figure(i)
    plot = plt.imshow(image.img_to_array(batch[0]))
    i += 1
    if i > 4:  # show 4 images
        break

plt.show()

#use pretrained model
#Imports
import os
import numpy as np
import matplotlib.pyplot as plt
import tensorflow as tf
keras = tf.keras

#Imports
import os
import numpy as np
import matplotlib.pyplot as plt
import tensorflow as tf
keras = tf.keras

get_label_name = metadata.features['label'].int2str  # creates a function object that we can use to get labels

# display 2 images from the dataset
for image, label in raw_train.take(5):
  plt.figure()
  plt.imshow(image)
  plt.title(get_label_name(label))

#data processing on unify the size
IMG_SIZE = 160 # All images will be resized to 160x160

def format_example(image, label):
  """
  returns an image that is reshaped to IMG_SIZE
  """
  image = tf.cast(image, tf.float32)
  image = (image/127.5) - 1
  image = tf.image.resize(image, (IMG_SIZE, IMG_SIZE))
  return image, label

#now apply this function format_example to images using map
train = raw_train.map(format_example)
validation = raw_validation.map(format_example)
test = raw_test.map(format_example)
#take a look at size-unified images
for image, label in train.take(2):
  plt.figure()
  plt.imshow(image)
  plt.title(get_label_name(label))
#shuffle and batch the images
for img, label in raw_train.take(2):
  print("Original shape:", img.shape)

for img, label in train.take(2):
  print("New shape:", img.shape)

#the output is
# Original shape: (262, 350, 3)
# Original shape: (409, 336, 3)
# New shape: (160, 160, 3)
# New shape: (160, 160, 3)
Next use pretrained model, then add on to this labeled dataset to train:
#use pretrained model
#Imports
import os
import numpy as np
import matplotlib.pyplot as plt
import tensorflow as tf
keras = tf.keras

#Imports
import os
import numpy as np
import matplotlib.pyplot as plt
import tensorflow as tf
keras = tf.keras

get_label_name = metadata.features['label'].int2str  # creates a function object that we can use to get labels

# display 2 images from the dataset
for image, label in raw_train.take(5):
  plt.figure()
  plt.imshow(image)
  plt.title(get_label_name(label))

#data processing on unify the size
IMG_SIZE = 160 # All images will be resized to 160x160

def format_example(image, label):
  """
  returns an image that is reshaped to IMG_SIZE
  """
  image = tf.cast(image, tf.float32)
  image = (image/127.5) - 1
  image = tf.image.resize(image, (IMG_SIZE, IMG_SIZE))
  return image, label

#now apply this function format_example to images using map
train = raw_train.map(format_example)
validation = raw_validation.map(format_example)
test = raw_test.map(format_example)
#take a look at size-unified images
for image, label in train.take(2):
  plt.figure()
  plt.imshow(image)
  plt.title(get_label_name(label))
#shuffle and batch the images
for img, label in raw_train.take(2):
  print("Original shape:", img.shape)

for img, label in train.take(2):
  print("New shape:", img.shape)

#the output is
# Original shape: (262, 350, 3)
# Original shape: (409, 336, 3)
# New shape: (160, 160, 3)
# New shape: (160, 160, 3)

#in real practive, we can pick the pretrained model
#for example. google imagenet contains1.4 images and 1000 different classes
IMG_SHAPE = (IMG_SIZE, IMG_SIZE, 3)

# Create the base model from the pre-trained model MobileNet V2
base_model = tf.keras.applications.MobileNetV2(input_shape=IMG_SHAPE,
                                               include_top=False,
                                               weights='imagenet')

#the base model simply will output a shape of (32, 5, 5, 1280) tensor

#then freezing the base
#  freezing refers to disabling the training property of a layer. It simply means we won’t make any changes to the weights of any layers that are frozen during training. This is important as we don't want to change the convolutional base that already has learned weights.
base_model.trainable = False
base_model.summary()
#adding our classifier
global_average_layer = tf.keras.layers.GlobalAveragePooling2D()
#add predition layer
prediction_layer = keras.layers.Dense(1)
#then combine these layers in a model
model = tf.keras.Sequential([
  base_model,
  global_average_layer,
  prediction_layer
])
#trainig model
base_learning_rate = 0.0001
model.compile(optimizer=tf.keras.optimizers.RMSprop(lr=base_learning_rate),
              loss=tf.keras.losses.BinaryCrossentropy(from_logits=True),
              metrics=['accuracy'])
# We can evaluate the model right now to see how it does before training it on our new images
initial_epochs = 3
validation_steps=20

loss0,accuracy0 = model.evaluate(validation_batches, steps = validation_steps)

# Now we can train it on our images
history = model.fit(train_batches,
                    epochs=initial_epochs,
                    validation_data=validation_batches)

acc = history.history['accuracy']
print(acc)
model.save("dogs_vs_cats.h5")  # we can save the model and reload it at anytime in the future
new_model = tf.keras.models.load_model('dogs_vs_cats.h5')
Model saved, ready to use anytime, here is a real case in work.
